Comments: (2)
As I was pursuing my plethora of blogs that I follow (there were 500+ posts to review... nope... I didn't make it through all of them... so, I moved on...) I spotted this particular post at Craftaholics Anonymous for a really cute nursing cover.

I went to her Etsy shop, Ruffled Begonia, and purchased the Summer Love Ruffle Nursing Cover PDF.  The instructions were to the point and simple. The owner of the shop, Linda, even offers to be available via email if any questions or confusion crops up... although I didn't have ANY problem.  I was able to complete it in a day with my sweet five "distractions", pesky pooch, and severe weather warnings... not bad, eh??


I used a poly blend for the ruffle and neck strap but a medium weight cotton toile for the apron part.


This one is for one of my gal-pals who had a new baby girl recently. Now I need to get on with another one for me!! Do you think an additional ruffle at the bottom of the apron would be too much?

Comments: (0)
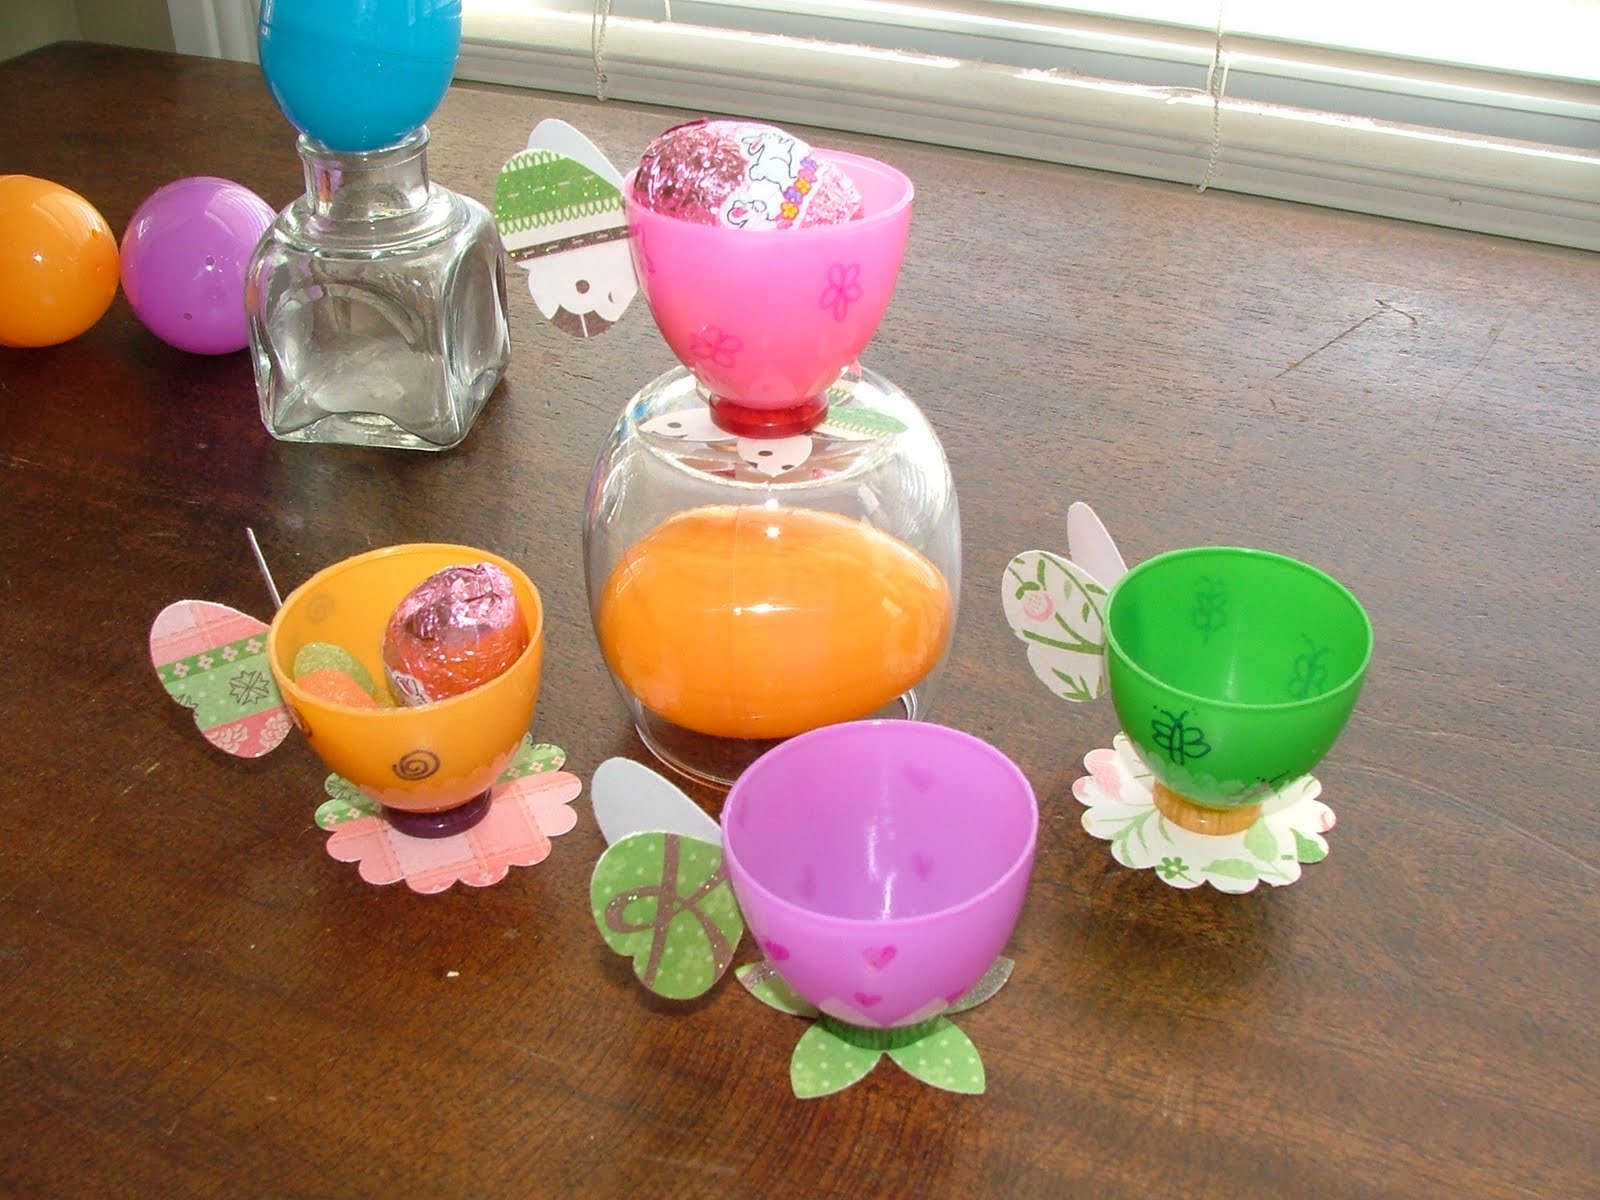
Well, hello again!! I found this cute little project yesterday and thought that this would be a fun thing to do for my Community Bible Study class tomorrow. There are so many ways to dolls these babies up and here's my attempt...


So, first I headed to the Dollar Store and got a package of 18 plastic eggs. Gotta love the Dollar Store... And these ones were attached by this little tab of plastic. Handy, but for this project - not.  


So I got one of the MILLION fingernail trimmers that we own (what is up with this house and the plethora of finger/toenail trimmers???) and tidied up the little hangy-outty thingies - sorry to use such a technical term.


Using the one of the halves, I got a 3/4" button and glued it to the bottom of the egg half with E6000. I don't know if that is a little overkill on the adhesive. I just used what I had. And the fact that the button had a concave center on one side was rather advantageous.


Then I got my Sharpies out and started drawing little designs from swirls, to hearts, to butterflies, to flowers... you know... whatever you would doodle... I noticed that if I tried to draw where my finger were that the Sharpie didn't take as well. I had just made a batch of bread and I think the olive oil was not *entirely* off my hands. Good for moisturizing my skin but obviously not for crafting.


I really enjoy messing with my paper punches so I used some of my pretty papers and punched the butterfly shape for the "holder" part of the cup and then put an extra base using the flower and scallop shapes. Again, attaching with my E6000.


So, there they are! Cute, huh??


The latest five book covers.


If you'd like to make your own just go here and if you'd like to see some other ones that I made just check it out here.
Remember this post? I made a few more variations.


My viking costume adventure has continued to the last minute (because that's they way I work... always waiting until the final countdown). And since my time is up here are the final touches on "Hiccup".

My hubby did not get the opportunity to do the dragon artwork for the helmet so I went for it. Not bad... not great either, but I generated something from some other pictures I found and I think it at least can not be mistaken for a bunny or a unicorn or anything else un-viking like. After the helmet project I almost feel like I could do most anything with duct tape and a Sharpie pen!


The shirt used to be mine and it was the right color according to the movie and I wasn't really going to miss it so I donated it to the cause. I put some grommets in the top with my Crop-O-Dile and laced it up with some leather jewelry cording.


Huccup had on a fur vest but Walmart had a couple of brown towels that I found and figured that I wouldn't be able to find faux fur for $5 (say that 10 times fast - ha!) so when tonight is over it will turn into a shower robe. How's that for recycling?!


Now for all this work he has to submit to me some of his haul tonight. Thay all do. The advantages of a large family - more candy. ROFL.

I have read all the books in the How to Train Your Dragon series. I thought it was cute and funny *BUT* it relies heavily on potty-humor. So when I found out there was an animated movie I was excited and wincing at the same time. We queued it on Netflix and took our chances (I don't recommend this parenting technique, by the way). To my absolute delight, the movie adaptation was nothing like the book. And I liked it so much I bought it. Oh, and the boys thought it was pretty cool too.


We are going to a local church harvest fest and the boys want to dress up. Numbers 2, 3 and 4 all wanted to be knights. It's all about the hardware. And they reeeeeaaaalllly get into the part.


And getting back to the whole HTTYD thing... my #1 son thought Hiccup from the movie was pretty cool so he decided that he would like to be "Hiccup the Horrendus".  Maybe he's getting a little old for the dress up thing. Maybe I just want to be in denial that he *is* too old for dress up. Whatever. Don't judge me.

So I set off into online-land to find a viking hat and didn't have a whole lotta luck. One guy even suggested using a "spare bicycle tire fender (??!?!!?). No, I don't have one of those. But I do have duct tape and with a little bit of creativity we got what we were after.


I made it custom for the #1 boy by wrapping a piece of super heavy card stock around his head and then used one inch strip of the same card stock to create the dome of the hat. Then I WENT TO TOWN with the duct tape!

My hubby took three pieces of newspaper and a wire hanger and began the creation of horns. Again, HE went to town with the duct tape. Love that stuff. He left a few inches of the wire coming out of the base of the horn and I was able to engineer it so they wouldn't be floppy. How confident can a floppy horned viking be, after all?

Then I glued those clear floral rock thingies (this is a technical term in my world) to it for the rivets. The last thing is to add a really cool dragon to the sides - that's hubby's "to-do" and he's pretty jazzed to come up with something.


The card stock was packaging that I had kept because "I might need that for something in my lifetime". The duct tape was $3, a few pages of newspaper and a sacrificial wire hanger  helped us a lot. Then I had gotten the floral rock thingies that came in a bag of 50 (?) for a buck at the dollar store - again it was originally for a different project and I hung on to the rest for that "something" in the future. A Sharpie pen will do for the dragon artwork that is in progress.

For a one time use of fun we didn't want to bother with "investing" in a silly dress up item. But we're pretty happy with the outcome. I may need to make some extras for the knights who abandon their post and hit the high seas!!!
{UPDATED 10/11}

I should know better than to do this but I have this "thing" about using new recipes on dinner guests and potluck Sundays. The practical side of me is screaming, "Don't do it!!" And although I've had few occurrences that I was unable to salvage that day is bound to arrive!!

That said - I tried this muffin recipe on my special gals at CBS. And it was well enough received that I thought it was worthy of posting. I got the recipe here and it just sounded yummalicious!! I didn't use the ground flaxseed only because I didn't have it but it still turned out wonderfully. {update - I got some of that flaxseed and although there wasn't any taste/texture difference I'm sure the nutritional benefits went up.} I think they would probably even freeze well if you wanted to double it. FYI: I did make some minor changes to the original recipe to suit my preferences.

MORNING GLORY MUFFINS
Ingredients:


1 cup all-purpose flour
1 cup whole wheat flour
3/4 cup brown sugar
1 1/2 tablespoons cinnamon
2 teaspoons baking powder
1/2 teaspoon baking soda 
1/2 teaspoon salt
2 cups grated carrots
1 apple chopped
1 cup craisins 
1/2 cup chopped pecans
1/2 cup ground flaxseed
2 eggs
2 tablespoons honey
1/2 cup unsweetened applesauce
1/4 cup extra virgin olive oil
1 tablespoon vanilla extract

Directions:

Preheat oven to 375 degrees.  


Whisk together the eggs, honey, applesauce, oil, and vanilla. These are the "wet items".


In a large bowl stir together the flour, brown sugar, cinnamon, baking soda, baking powder, salt and ground flax seed. This is the "dry items".

Combine the carrots, apple, and craisins.

Chop nuts. I just wanted to show what an awesome job this kitchen tool does with nuts (and so many other foods). It's called a Vidalia Chop Wizard and I got it at Target. It is absolutely fabulous! I have replaced my Pampered Chef Food Chopper with this and have *never* been disappointed!!

Whisk the dry items to the wet items together until it is moistened.  Now pour that yummy smelling batter onto the fruits/veggies mix along with the nuts and combine well.

This is such a pretty batter, huh?

I like to use the Pampered Chef Large Stainless Steel Scoop to fill the muffins cups. It keeps the cups tidy (avoids burnt spots where batter was dripped), and they are uniform scoops so they are all evenly baked. And if you are maintaining portion control this scoop holds three tablespoons of batter.

Bake for 15 to 20 minutes and let cool (if you can wait that long) on a rack.
This yields about 2 dozen muffins and each muffin is three Weight Watcher points.